Wednesday, August 10, 2005

Exercise 3. Get Inspired

The photograph that inspires me the most in FP PandAOS (though they are all inspiring) is the shot on Page 18. Wow!! I have been trying to do that since I got the book, and have not been successful. Maybe I just haven't found the right subjects, but it sure looks easier than it is! It really has a wonderful impressionistic feel while being soudly grounded in "regular" photography.

Yesterday, I thought I had something, and I shot this, but it doesn't come close. Of course, as part of my bikeride, I only had my P&S with me. Maybe I'll go back tonight and try again with my SLR. Here it try 1 anyway. Suggestions?


Exercise 2, Part 2. My Backyard (Done Right)

Well I both hated and loved this exercise. I learned that I like taking pictures--even bad ones. It's just enjoyable time for me. I did get some more insights into seeing "minutia" while I'm there. But other than the joy of using F/1.8 to get a nice blur, I had trouble finding good shots in that area of my backyard (even though I am sure that was one of the better areas of my backyard for pics). Here's 10 of them (as you know, we changed the exercise to 10.


Exercise 2, Part 2. My Backyard

I went to do Exercise 2, Part 2. I took my steps into the backyard, and walked right into the fence. So I just took my 7 paces radius from the fence and used only half the circle.

But worse, when I got to this area, the first thing I noticed was this little frog.


He had all my attention, of course. In the time I had, I proceeded to take all the pics of him! But worse, after some shots with my 50mm lens, I knew I needed to seize the opportunity and get closer! So I grabbed my extension tube, and shot some more, and then started shooting stuff in site with the extension tube in place.

Thus, I failed the exercise. I will need to go back to my yard and redo the exercise!

I did however, in FP style did try to "see" the frog differently, experimenting with different angles and DOFs. And my experience also reinforced something important about working with insects and animals (second time). Take your time, and don't immediately jump in and start taking closeups, talk to them softly (animals anyway), approach slowly and low (but block there escape path if you can). This guy stayed with me for a while and I was able to try lots of things even if they were a bit outside the rules of the experiment.


Exercise 2. Parts 1 and 2 Described.

Exercise 2.

Part 1: Have someone (other than yourself) choose three seemingly unrelated items/objects for you to photograph together. Don't expect masterpieces, expect a struggle. Minimum requirement: 20 pictures.

Part 2: Pick up your camera, a 35-50mm lens, and your tripod, and go to the front (or back) door of your home. Take 19 steps. Mark the spot. Take seven more steps from that point. The seven steps from your original 19 mark the radius of a circle, in which you should shoot at least 20 images. You should feel desperation during the exercise. You will only start to make visual break throughs when you have run out of the obvious picture possibilities.

Breaking Rule #2 (redo). Keep the center of interest in sharp focus

I was out today on my bike ride and I decided to try to break this rule again. We have all found this one difficult. I decided to try something EXTREME. I wanted to take advantage of the rich summer colors here and to use that as the center of interest of my photo, thus eliminating the need to keep ANYTHING in focus! I was'nt too sure how it would come out, and it was with my little S1 rather than my SLR (which I don't take on bike rides).

Please let me know what you think of these. I like them, but I know most people HATE out of focus pictures! These are straight from the camera, except for a simple resize to 800x600:


Tuesday, August 09, 2005

Breaking Rule #7. Make sure you are standing still, in a firm tripod like stance when shooting! and Rule #6. Always look through the viewfinder,

I have been experimenting with shooting from my bike. This actually breaks an additional rule (#9) since I am not only moving while shooting this, I am not looking through the viewfinder or at the LCD (otherwise, I could CRASH!):

Breaking Rule #5. Keep the camera level (watch those horizons)

I held this one back as it was part of a series I have been considering for "time capsule" (but I didn't enter). I have really enjoyed tilting the camera, and I now see that there's some good uses for this technique! So I plan to add it to my bag of tricks.

(Note: this is just a quick convert from RAW with a crop--sorry, I didn't spend any time processing this example)

Breaking Rule #4: Use the rule of thirds in composition

I break this rule whenever I see fit--but lately, I've been more conservative.

Of course, it's pretty easy to find a subject where breaking the rule is natural for centering:


(Shot taken this past weekend at the NYS Museum).

But it's harder in some cases to decide when you have sufficient justfication to ignore the rule. I just go by whether or not the scene appears balanced and well composed, e.g., there are other rules of composition in play, like fill the frame, geometric balance, etc.


(This shot is from "Frog and Toad", a play by the Young Actors Guild I went to this past weekend.)

Saturday, July 30, 2005

Breaking Rules #8 and #9. Shoot on sunny days, at the right time of day, with nice clouds in the sky (and never shoot through the window)

I can't do these in order ;)

Shooting experimentally is actually pretty normal for me. I added this rule to my list because on one of my trips to do underexposure it was raining. But I didn't let that deter me, and in fact, I remember doing this a couple of weeks ago near my house. So I thought this would be a good rule to add, and show how I've broken it.

Also my rule #9, since I shot this through the car glass!


I think this particular experiment was a success. I like the painterly feel of this photo. I left it "muddy" in its colors because that's the mood in the rain, and I think it makes it more impressionistic. It's actually similar to the experiments I've been doing over the past year using a blank Cokin filter, and vasoline. For example, this shot from the freestudy challenge: In the Midst of Impressionism

Heres another I took earlier this month. The subject isn't interesting, but the impressionistic effect is (IMHO). This is unprocessed (straight conversion from RAW--not sure how to process it without "ruining" the effect):


This one doesn't have the impressionistic effect, but I like the rain here:

Friday, July 29, 2005

Breaking Rule #3: Adjust your camera so the exposure is right

This one has been very very hard for me. I've done it now in three outings, nothing seems worth posting. I am not holding back for a keeper. There's just nothing "special" at all about what I've captured. Just looks like a mistake to me.

Ok, I'll post one example from tonight. What's wrong is that I don't see any "benefit" whatsoever to underexposing this:


I think I'll come back to this one later...

Tuesday, July 26, 2005

Breaking Rule #2. Keep the center of interest in sharp focus

I went out on my daily bike ride today with my Canon S1 in search of opportunities to break some rules. Rule 2, Keep the center of interest in sharp focus, is a hard one to break and end up with an image that doesn't call for the Delete key. Of course, FP's point is that by breaking rules, you discover what might be interesting, and then you can pursue it, or you get lucky and even nail it right then.

Anyway, I found a nice scenic view of a bit of swamp near the bike path which has some pretty purple flowers (I dont know what they are called--just called weeds, perhaps). I took two shots using one of the front plants as my reference: in one case, I focused on the subject (the purple wild flowers), and the other on the front plant.

While I don't think either of these shots is a keeper, I did learn something about these flowers. I found that these purple flowers make a very nice OOF backdrop--very impressionistic. I might try some more with this, picking the foreground I want, or even just going for a totally impressionistic look (and shooting with my SLR instead of the S1). That's another point--different lenses would show the OOF plants differently per differences in Bokeh. I can see some more experiments here...

Monday, July 25, 2005

Breaking Rule #1: Hold your Camera Steady

Well, I've broken this rule a lot in the past--one area where I have been creative IMHO :)

Here's some examples where I've broken the rule, and what I did:

(Incidentally, I am experimenting here with Blogger images too. While you can load it from DPC by pointing to the URL, it's a bit easier just to browse to it on your hardrive and let Blogger host it for you for free. The only trick is that you need to go to the Edit HTML tab and move the photo link to the place in the text that you want--it always goes to the top of the blog!)

In this photo, I put the camera on self timer, set it to a 1/2 sec or so exposure, and as the timer signal approached the exposure, I rotated the camera left 1/4 turn, then back and past start 1/4 turn right. Repeat quickly till the actual exposure happens!


Here's a couple of cases where the camera was quickly moved (flicked) in one direction while shooting:


In the following, I tried something different. I held my S1 by its strap, and "wound the strap up by turning the camera", so that when I let go of the camera, it would twirl to relieve the tension of the strap. I made sure the camera was pointing down at my subject, then set the self timer. At the self timer warning, I let go, and let the camera twirl. The idea was to try to get the camera to rotate vigorously around an axis, to keep the center sharp while blurring the rest. Here's the effect:


In this photo, I shot some flowers while moving the camera quickly diagonally:


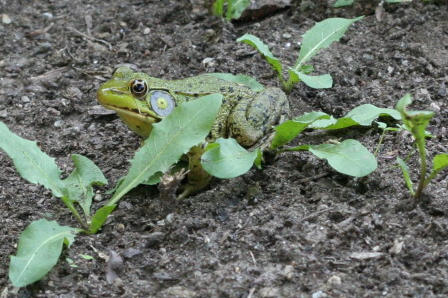
And here's one with more subtle movement:


I have many more examples but I think this illustrates creative movement. If I think of one with a very different technique I'll add it.

Comments welcome either here or in my DPC portfolio (they are all there either in the main folder or "Abstracts Impressionism".

(Edits: Note I changed my mind about linking images to DPC rather than uploading them; its just easier to upload, and then you don't use DPC bandwidth at all). I see the problem David was the extra image I had linked but forgotten about--now at the end. I was looking at the pirrouetting one!)

My List

My expanded rule list to break...

Rule 1. Hold your camera steady
Rule 2. Keep the center of interest is in sharp focus
Rule 3. Adjust your camera so the exposure is right
Rule 4. Use the rule of thirds in composition
Rule 5. Keep the camera level (watch those horizons)
Rule 6. Always look through the viewfinder, and compose carefully before shooting.
Rule 7. Make sure you are standing still, in a firm tripod like stance when shooting!

EDITED: More rules I've thought about breaking (and recently broken)

Rule 8. Shoot on sunny days, at the right time of day, with nice clouds in the sky
Rule 9. Go outside - never shoot through the car window

Exercise 1. Breaking the rules. (Statement of the Problem)

Exercise 1. Draw up a list of some photographic rules, then take photographs that break them. For example:

Rule 1. Hold your camera steady
Rule 2. Keep the center of interest is in sharp focus
Rule 3. Adjust your camera so the exposure is right
Rule 4. Use the rule of thirds in composition
... etc.

This is close to the text of Pattersons book, but not exact, so as not to plagiarise.

Beginnings

The Freeman Patterson Workshop Group at DPC are going through the FP books and exercises together. This blog is my log of my experiences.

The first book we are going through is "Photography and the Art of Seeing" (by Freeman Patterson, of course!)